Kieran Hoboken and SoHo Experience
On Wednesday, May 20th we went to Hoboken. The first place we went was the beautiful waterfront park to take pictures of buildings, patterns, and of people. Surprisingly, it was very busy at the park and teachers, students, and other people who just wanted to enjoy the magnificent weather and scenery flocked into the park. This made our assignment, which was primarily to take “street photography” much easier. After we were done taking pictures at the park, we went to the downtown part of Hoboken, which was buzzing with life. It was fun to just walk around in the streets and take artistic pictures of people. I personally just tried to keep every picture of people using the rule of thirds.

On Thursday, May 21, we went to New York at Washington Square Park, and around the SoHo area including Broadway. It was a lot of fun and there were many opportunities for interesting pictures to be taken. Washington Square Park for me was the best place to take photos. One reason is that there weren’t any stores or places to get food that would distract me or keep me from actually taking the photos. There were also many patterns and buildings in the area that made for interesting pictures. Broadway and SoHo were too distracting for me, which is why I didn’t take as many photos after we left Washington Square park. The stores with sunglasses especially distracted me.


Bruno’s EV Project
In this photo the EV was at + 2.0 which makes it seems that the dark has a great amount of light but really its a dull environment. The higher the EV is the more light the picture seems to have.

This picture was taken with an EV of -2.0 which makes the room darker then it really is. No matter how light the room is, when you decrees the EV it makes the picture seem to be in the dark room.

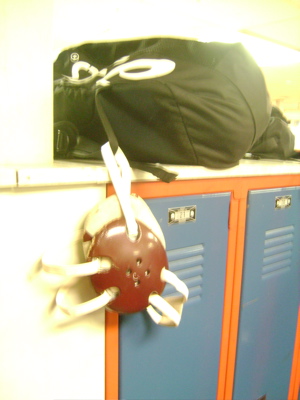
This picture was taken with an EV of zero which makes the picture realistic. This shows how light or dark the room really is.
In this project I figured out that the greater the EV the more light the picture is going to have. ON the contrary, the smaller the EV the less light the picture will have. You can make it seem that its night time at 12 noon by just decreasing the EV to a negative number.
KEVINS Ev

this photo was taken using an ev of 0.0 so you can see that the picture is seen how it would appear in person.

this photo is the same picture but instead i am using an ev of 2.0 which makes the picture seem brighter.

in this photo i used an ev of negative 2.00 so it seems that this picture was taken at night time even though it was really taken in early afternoon.
Exposure Compensation

This is a photo of an alley at St. Benedicts Prep that was taken with a high exposure which made the photo be much lighter

This is the same picture of the alley at St. Benedicts Prep but with an exposure of 0.0 also know as normal. So this picture is the normal view

This is the same picture of the alley at St. Benedicts Prep but with a low exposure. The low exposure makes the picture look as if it was darker then it actually is.
Exposure Compensation

This Photo shows the exit sign in a low exposure which makes everything in the room looks very dark when it wasn’t.
The Exposure

Changing my exposure to to -2 made the photo darker. All the details could not be seen due to the image, but even thought the photo was taken in the afternoon, the picture seem as thought it was night time. The clouds were more detailed than the rest of the pictures,make a scene as thought it was about to rain.

Using the exposure at 0 made a drastic change from the photo above. Even thought their is a person in the picture, the image is more clear and has just the right lighting. The clouds don’t show as much but the view of the street and tree are just right.

When the exposure is at +2 the image is lighter and makes a bleached appearance to the photo. The sky is hard to see, much like a blurry image. Raising the exposure of your camera can make your photo harder to see.
Exposure Clint
Exposure Compensation
The first photo was taken with a 0.0 exposure.

The second photo was taken with a +2.0 exposure

The Third photo was taken with a -2.0 exposure

When using a negative compensation it looks like the picture is taken in a dark room, as in the third picture. Using a positive compensation it brightens the photo, and looks like it is enhanced by more light.


My Exposure Compensation

How unbelievable is it when you control the amount of light that passes through the shutters, it look amazing when you can make this image look so dark when its really not.
 However if you alter the amount of light exposure to a higher you get a much more brighter image, with a whole bunch of light passing through the shutters.

On the other hand, its amazing how the camera can suggest the right amount of light to use in order to get a normal picture.
2nd Assignment – Exposure Compensation


After i finished taking photos using three different types of exposures i noticed that each photo had a different effect when changed. The first one looks like a normal day photo. The second one looks like i used flash in the morning and the last photo looks like its about to sunset and gives it a dark lite.

leave a comment